ID Scan Procedure
The ID Scan Procedure section enables an applicant to scan a document as a proof of identity. By using this option, you can scan either a driver's licence or a passport as your proof of identity. Your details are scanned by using a third-party API (authID comes out of the box) and are automatically fetched from the scanned document.
For more information about authID, click here.
The ID Scan feature is supported on Mobile and Tablet devices only. The Desktop experience has been disabled due to security risks and will be revamped in a next release.
This section includes two segments:
- Document Verification: Verifies provided data against public and proprietary private databases for a match to authenticate the applicant.
- Identity Verification: Verifies the identity based on the applicant’s static and liveness selfie photos against the scanned document ID (Driver License, Government ID, or Passport) and authenticates the applicant in case of positive match.
As a Prospect user, after clicking Start New Application in the UserType Screen in mobile or tablet device, the ID Scan Procedure section appears. However, in the Desktop web application, you will be navigated to the Personal Information section.
UX Overview
This section provides an overview about the ID Scan Procedure.
To scan your proof of identity in the ID Scan Procedure section, follow these steps.
- Depending on the document you want to scan, select Proceed with passport or Proceed with Driver’s license.
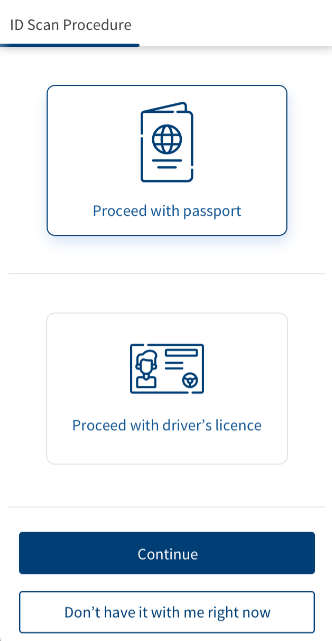
If you want to skip the ID Scan Procedure section and provide your personal details manually, then click Don’t have it with me right now.
- Click Continue. The Document verification section appears.
- Click Open Camera and capture the selected document.
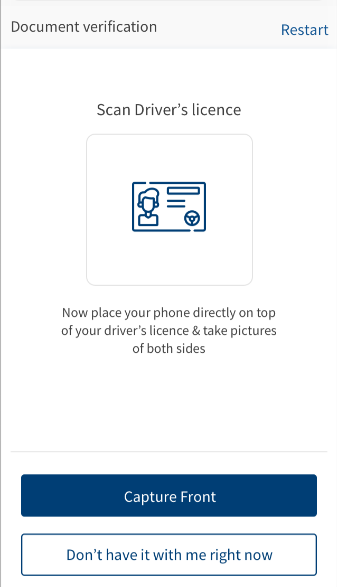
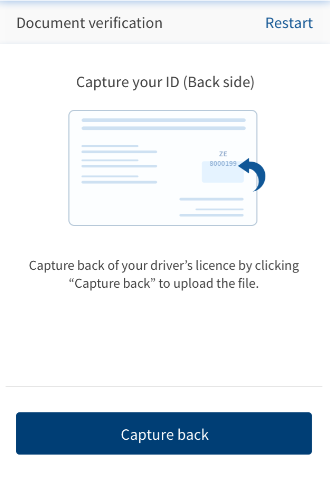
- If you selected Driver’s License, click Capture Front. The device Camera opens. Click the picture and select Continue. Then select Capture Back and click the picture.
- If you selected Passport, click Open Camera. The device Camera opens. Click the picture. Check the captured image and select Continue. If you want to re-capture the image, click Capture again.

- At any point after capturing an image of your ID, if you want to restart the ID Scan procedure, select Restart.
- Ensure that the document is placed inside the green border. If the border appears in red, it implies that the document is not properly aligned, and you must re-align the document.
- If you selected Driver’s License, click Capture Front. The device Camera opens. Click the picture and select Continue. Then select Capture Back and click the picture.
- Click Continue. The Selfie Verification screen appears.
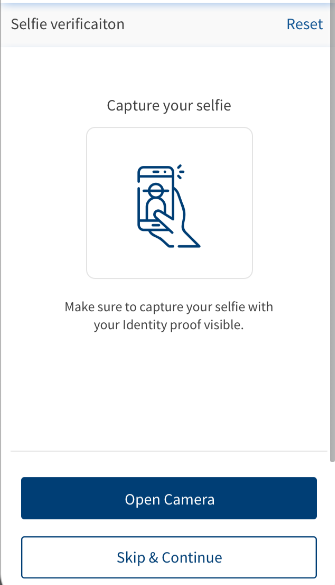
- Click Open Camera and capture your selfie. Once done, you can click Capture again to re-capture the image, otherwise click Continue. The liveness Selfie Verification section appears.
If you do not want the selfie verification module, click Skip and Continue.
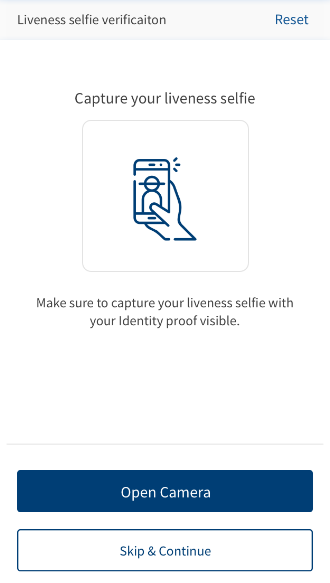
- Click Open Camera and capture your liveness selfie. Once done, you can click Capture again to re-capture the image, otherwise click Continue.
The Personal Information section is displayed with the pre-filled data. Furthermore, some fields in the Address & Identification section are also pre-populated.
- The decision business rules have been enhanced to include an applicant’s approval model based on the ID Selfie verification. This is an individual module that comes out of the box using the PAM solution.
- Besides the scan feature, complex logic has been implemented for error handling on both ID Scan and Selfie Verification. These error handling features are linked to authID error cases, however, can be enhanced for other third-party APIs.
Components
The ID Scan Procedure section contains the following list of components:
| Component Name | Instance Name |
|---|---|
| com.dbx.IDScan | IDScan |
| com.nuo.Roadmap | Roadmap |
| com.konymp.authenticid | authenticid1 |
| com.konymp.authenticid | authenticid2 |
| com.konymp.authenticidUpload | authenticidUpload1 |
| com.konymp.authenticidUpload | authenticidUpload2 |
| com.dbx.bannerError | bannerError |
| com.dbx.customheaderNUOV2 | customheaderNUOV2 |
| com.dbx.customfooter | customfooterNUO |
| com.nuo.customheader | customheader |
| com.nuo.loading | loading |
| com.dbx.popup | popup |
| com.nuo.procedureForNUO | procedureForNUO |
Experience APIs
The following API is shipped as part of this feature:
| API | Description |
|---|---|
| ValidateDocument | This API retrieves the details of the uploaded or scanned documents. |
| VerifyLiveliness | This API verifies the liveliness selfie (Far selfie) with the photo of the client in the document. It leverages a third party vendor called AuthenticID. |
| updateSelfieScoreAndResult | This API updates the selfie score and result fetched from the Authentic ID to the Origination Data Microservice (ODMS). |
Configurations
The system administrator will have the capability to configure this module from the Spotlight app. For more information about configuring the ID Scan feature, click here.
Extensibility
By using the Extensibility feature, you can customize the modules based on your requirements. For more information, refer to Extensibility.
In this topic